See what I did there? Well so much for "hoping" right back on the blog bandwagon.
I hope everyone had a lovely Easter. I spent a good chunk of it in my car alone, but hey that's the price you pay to get to go see your cousins's adorable twin girls. Babies! Silly hormones.
I did get to try a new recipe from Pinterest. I made blueberry white chocolate chip cookies and they were amazing! Often times my cookies don't turn out as lovely as I would hope so this was a nice change. They were a big hit for Easter and I think the flavor is perfect for spring. Maybe add some dried cranberries to make it red, white, and blue worthy for 4th of July!
Have I mentioned that I am obsessed with Gingerbread houses? I think they are just the most adorable. I have dreams of hosting an epic gingerbread house decorating party but everytime I start to think about the details it all becomes a little overwhelming. Some day. For now I will have to console myself with helping out at my work's gingerbread class they host every year. We had an extra house one day, and some extra time so I got to decorate a house. I did one last year with the candy and such but this year I decided to let the kids use the candy and I would content myself with just using some royal icing.
Classic and sort of vintage feeling. And delicious...did I mention delicious? I think I better go make some gingerbread cookies to enjoy right now!
I have had the idea in my head of making my house look like a giant Gingerbread house for quite awhile. I am finally going to start making that happen! I made some cute Christmas candy lollipops for the front yard for super cheap.
I started with a broken drying rack that I had lying around (I never throw anything away!)
First I took all the white dowels off of the rack.
I bought some styrofoam plates for the candy part. I needed something that would hold up well in weather. To make it look a little more candy-like and less plate-like I trimmed off the outer edge of the plates.
....And I kept the scraps to make some other project!
Using craft paint from my stash I whipped up some lollipops. After experimenting with a few different designs I was most happy with the 'traditional' swirl design so I made more of those. This would be fun to do with kids- they could make whatever candies they wanted!
Even though you will mostly only see one side of these I made each one so that both sides were decorated. After the paint was dry I took each pair of plates and sandwiched them around the dowels and glued them together. I finished them By wrapping some clear plastic bags on top and tying with some ribbon.
Thankfully the ground hasn't gotten so solid that I could fairly easily just shove these in the ground. It will look a bit more Christmasy once there is some snow on the ground! It will probably take me a couple of years to get enough projects done to make it look properly 'gingerbread' house but I am up for the challenge.
Nothing seems to make my heart sing quite like sequins. I think that when I was in school and a die-hard tomboy the years of shunning all things 'girly' has now swung to the other end of the spectrum. Now I am the girl with sparkle everything, way too many dresses, and an obsession with pink. Hmm. Cycles I tell ya.
Combine thrift store finds AND sparkles and you have a most winning combination in my book!
The perfect Christmas green sequin shirt! All the stores are all a glitter this time of year for the holidays coming up and I love snagging a thrifty-vintage find. At $3 this top also be easy on my tight holiday budget! It came complete with shoulder pads but I took those out!
This lovely dress also had elbow pads. Not quite a sparkly beauty but the cute print and small details on this dress make it a great find in my book!
Both of these outfits look slightly frumpy on my tiny dress form. They look even better on someone with the curves to fill them out a bit ; )
Happy early Easter! I am so excited to share with you a perfect little craft project just in time for the weekend- Making your own Easter Bonnet!
I really don't think we wear enough hats these days and my love for vintage and old movies always makes me jealous of those glorious hats!!! So I decided that I would make an Easter bonnet that would be a little easier to wear day to day. This project is great for both adults and kids! How adorable would it be to have little matching bonnets for all the little ones in your life? Super adorable. Lets get to it!
Mini Easter Bonnet Tutorial
Difficulty: Easy (young children will need help with gluing)
Cost: Cheap!
Supplies:
I bought:
-Little straw hats (in the doll section of the craft store) the small ones were 67 cents and the larger one was 79 cents. They also came in many different sizes- pick whichever one you like!
- headbands
-fake flowers (These were on sale so I couldn't resist but you could also make your own paper or fabric flowers!)
-little butterflies (could also use little birds, mini Easter eggs, etc.)
Total cost: $7.08
I had:
Ribbons and bits of lace. You can also use beads, scraps of fabric, or anything else you can glue down!
Tools:
I only used some scissors and a hot glue gun! Be careful if you use hot glue...I always seem to burn myself at least once a project. You can use any other glue you like but I love the quickness of hot glue.
Steps:
1. Start with one of your mini hats and start decorating! Think of Austen novels where they are sitting around decorating their bonnets. And with fancy hats there is no such thing as too much!
2. Decide how you want to wear your bonnet.
I liked the idea of putting it on a headband and I think this is an especially good way for kids. I took a cream colored headband and glued some lace on top of it. Then I decided where I wanted my bonnet and glued it down.
You can also had hair combs or clips underneath or I just left one plain and used bobby pins to secure it where I wanted it.
Happy New Year! 2011 is finally over and we have a brand new year to start off with a bang. I don't know about you but 2011 was not my favorite year. I had some really good times but it did not have the zing that say 2010 or 2008 did. I think I am an every other year kind of girl.
I spent New Years Eve in the chillest way possible. Sitting on my couch watching movies with a good friend. Pink champagne was still involved but I did not break out a sparkly dress this year. But it was really good- just what I needed. Best quotes of the night included, "The movie is called Warrior not pussy" and "Drinking champagne out of mason jars? It is like we are having a Harlan County New Years!"
I am trying to be optimistic about 2012. So far I have no huge plans in the works besides my friend's wedding in September (I have to go order my dress! Annndddd I might be making them wedding pie...more to come). I am just hoping to go with the flow and figure some stuff out. Other than the wedding I hope to go to some good concerts and get into some new activities. Roller Derby here I come!
To give myself some sort of direction this year (and a challenge) I am starting a 365 project. Inspired by many others doing similar projects I thought I would try my hand at it. If you are interested in hearing about what other people are doing/have done I highly recommend this blog. I have decided to make a necklace a day for a year. Starting now. Rules will be fairly simple. Post a handmade necklace everyday on the blog. I wanted something that would be crafty but also focused and doable. I believe that necklaces will be a narrow enough requirement to keep some of my 'crazy' out of the equation but will be perfect time-wise, space-wise, and money-wise. There is still a ton of room for creativity including themes, techniques, materials, etc. If I know I have trips or events I will make the necklaces ahead of time and just try to keep on schedule. I have a feeling things are going to get pretty random...I already have some ideas for some large fun STATEMENT necklaces that will hopefully be fairly epic.
I will still continue to post any other fun crafts or baking adventures that come my way but I have a feeling that this project will be the most prevalent part of the blog this year.
Here is number 1:
A little bit of granny, a little bit of punk this necklace is a combination of a chunky vintage chain and some hand crochet work.
My friends are such nerds. Recently the joke has been 'Team Friendship' and it is our slogan, motto, and battle cry. Two friends in particular were really into the idea. They decided who was in (almost everyone :) and they also wrote a little jingle that they sing together. We joked about getting t-shirts or sweatshirts made. So when Christmas rolled around and I was having trouble thinking of gifts for people I decided a couple of sweatshirts where just the thing. Of course I waited too long to get them screen printed so I headed to my trusty craft store and bought some flocked iron-on letters.
The results were pretty good!
They loved their gifts. Now I will probably make more for the other members!
The last few days have been a whirlwind of holiday celebrations. Thanks to all my friends and family who made it such a special season! I will have to do a post about the generous gifts I received (my friends know me so well!) but today I am going to share with you a little post on what to do with some of that Christmas candy you got in your stocking.
Candy Christmas Trains!
This is a project my mom used to make when I was little. I made a few up this year to give with gifts but they would also make great party favors, gift card holders, ornaments, or place cards.
Basics:
Candy. At the very least you need a pack of stick gum and some lifesavers. Around Christmas I buy the lifesavers in the 'holiday storybook' packs of six. I had to hunt around for the gum but the basic candy aisle in the store is your best bet. For the wheels peppermints work nicely. The 'cab' is a flatter piece of chocolate and the smoke stack is an upside down chocolate bell but a chocolate kiss works nicely as well. These are simply guidelines you can tailor it to your tastes and needs.
Now all you need is your trusty glue gun.
The order really doesn't matter as long as it works for you but for me I always start with the gum and lifesavers, then the chocolates on top and the wheels last. Since it is hot glue it dries super quick and when you are ready to eat it you just pop off the candy.
I made up a whole bunch for this family I babysit for...unfortunately the mom let them dig in right away and 5 minutes later the trains where decimated and I was left with 4 very sugared up kiddos! My mom used to make lots of these and I would take them to school as a treat. Since they are not strictly Christmas-y they work really nicely for that. We just always had them at Christmas so that is what I think of when I see them.
And when I say 'on a budget' I mean zero money. Well actually I think I spent 3 bucks on computer paper.
I took some old Christmas garland from my mom's house and spent a night watching "National Lampoon's Christmas Vacation" and cut out some paper snowflakes. I didn't use any fancy schmancy patterns but I hear that there are some really good ones out there.
Strung some up with yarn to add some dimension above our table- also borrowed the table cloth from my mom!
My empty frames are back! I just love them so much. I strung them with some vintage white garland and hung a single snowflake from each one.
We decided to leave our 'Three Broomsticks' decoration up from the Harry Potter Party so I decorated them too. (Roomie changed the sign to read 'It's a Wonderful Life'!)
All the extra snowflakes got stuck up on a blank spot. Easy, festive, cheap. That is the only way I decorate! We have been just getting warmer temperatures and rain for the last couple of days here in MN so our perfect dusting of snow has left us! Hopefully we will get some more before Christmas...until then the inside of our house will have to function as our Winter Wonderland.
Happy Holidays!
Keep crafting...only ten days left before Christmas!
This post celebrates finally have internet at my new place. Plugged in and ready to go! December is here and now is the time to buckle down and get stuff done. I already have a white elephant party under my belt and the month will hopefully be filled with other fun with friends and loved ones.
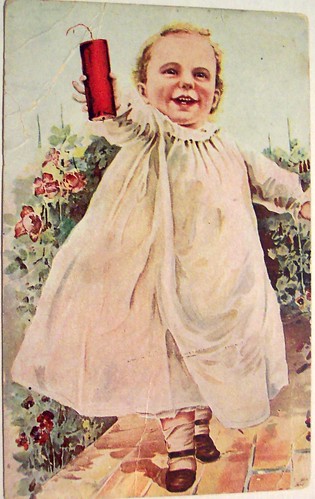
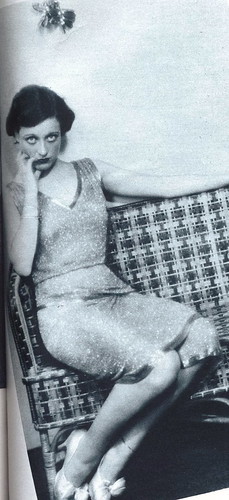
Until then I will be waiting under the mistletoe, just like Joan Crawford....
It was a lot of work and we were scrambling at the end a bit but the party came together rather nicely and was a SUPER GOOD TIME. Probably the best 'Halloween Saturday' (as I like to call it) in quite a long time. I just can't help imagining what I could do with more time and money!
Cauldron cakes, licorice wands, Bertie Bott's every flavored beans, and dips, chips, and other goodies.
The Three Broomsticks
Butterbeer!
Group shot (thanks to Muggle camera woman Miranda)
Fluffy
Doby the house elf
Time turner!
Ron
Hermione
Dolores Umbridge
Trelawney
Harry Potter
Professor McGonagall
Trelawney (less unhinged)
The birthday kids. Hahahahahaa. I love this picture! I will write another post and go into some of the crafty details in a different post. But for now I wish you a good nights rest before All Hallows Eve.